
2026 May 7th
The Bella Casa Measuring & Hardware Guide
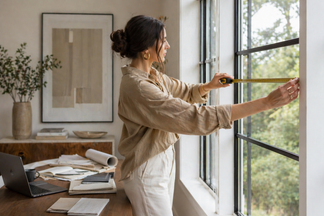
Using a metal measuring tape is essential for accuracy, as fabric or plastic tapes can stretch over time.
Step 1: Measure the Casement (Window) Width
- Outside Mount:Measure from the outer edge of the trim on the left to the outer edge on the right.
- Pro Tip:Measure at the top, middle, and bottom; use the widest measurement.
Step 2: Measure the Wall Space (Stack Back)
To ensure your made-to-order panels don't block the view when open, you need "stack back" space on the wall beside the casement.
- Recommendation:We suggest adding 6 to 12 inches of wall space on each side so the panels can "stack" off the glass.
Step 3: Measure the Window Length
Measure the vertical height of the window itself from the top edge of the trim down to the windowsill. This helps you understand the window's proportions before deciding on your final finished length.
Step 4: Floor-to-Ceiling Measurement
This measurement is critical for the high-end designer look that makes a room feel taller.
- The Placement:We recommend mounting the rod 2 to 3 inches below the ceiling.
- The Calculation:To calculate your final panel length, take your floor-to-ceiling measurement and deduct for the "drop" from the ceiling, the "lift" off the floor, and the rod hardware.
- Example:If your ceiling-to-floor height is 98”:
- Deduct 3” (for a 2.5” drop from the ceiling + a 0.5” lift off the floor).
- Deduct 2” for rod/hardware space.
- Total Deduction = 5”. Your ordered panel length would be 93”.
Step 5: Determine Stacking (Single or Centre Split)
Decide if you want your drapery to stack to one side or open in the middle (centre split).
How to Calculate for a Center Split:
If you want your drapery to meet in the middle and cover the entire span when closed, use this formula:
(Window Width) + (Left Wall Space) + (Right Wall Space) = Total Coverage Width
Total Coverage Width ÷ 2 = Width Per Panel
Example: 100" window + 12" total wall space = 112" Total Span. You would order two panels at 56" wide each.
Summary Worksheet
Grab your measuring tape and record these dimensions before you order:
- Window Casement Width:_________ inches
- Left Wall Space:_________ inches
- Right Wall Space:_________ inches
- Window Length:_________ inches
- Full Height (Floor to Ceiling):_________ inches
What Style of hardware suits your style best?
Adding the right rods to your custom drapery is essential to completing the look. The hardware you choose should complement both your fabric and your space. Here is our guide to the best pairings:
- Pinch, Reverse Box, & European Pleats: These styles pair beautifully with Decorative Metal Rods. Choose from a wide selection of finishes and finials to match your decor. For a minimalist or "invisible" look, use an I-Beam track.
- Grommet Drapery: Best suited for Decorative Metal Rods. Since the rod is visible through the grommets, selecting a complementary colour and finial is key.
- Ripple Fold: This modern style requires specialized hardware. Use a Decorative Channel Rod with finials for a high-end look, or a KS Track for a sleek, recessed, or "invisible" installation.
Mounting & Functionality:
- Versatile Mounting: Our Channel Rods, KS Tracks, and I-Beams can be mounted to either the wall or the ceiling, giving you maximum flexibility for your layout.
- Wall-Only Options: Decorative Metal Rods are designed specifically for wall
- mounting.
- Functional Movement: If your drapery is functional (frequently opened and closed), we can use a special bypass bracket on our Channel Rods to ensure the carriers glide smoothly past the supports without catching.